A WPF Message Box implementing material design
![]()


The message box has the following custom features:
✅ Material Theme design
✅ Custom styles for border window, message foreground and background, title foreground and background, border, etc
✅ Button to copy message box details to clipboard
✅ Scrollable message box content
✅ Right to left (RTL) support
✅ Message content is .NET UIElement which can host any content
$ Install-Package MaterialMessageBoxOr, if using dotnet
$ dotnet add package MaterialMessageBoxCreating a simple message box
MaterialMessageBox.Show("Your cool message here", "The awesome message title");
Show a message box with RTL support
MaterialMessageBox.Show("Your cool message here", "The awesome message title", true);
Showing an error message
MaterialMessageBox.ShowError(@"This is an error message");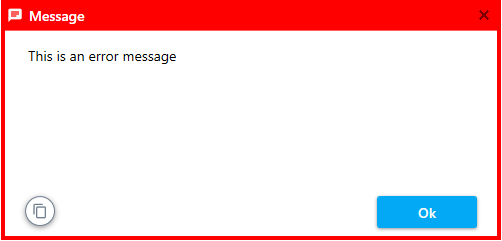
Showing an error message
MaterialMessageBox.ShowError(@"This is an error message");Capturing Message Box Results
var result = MaterialMessageBox.ShowWithCancel($"This is a simple message with a cancel button. You can listen to the return value", "Message Box Title");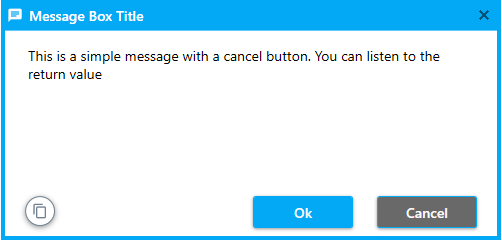
Styling a message box
CustomMaterialMessageBox msg = new CustomMaterialMessageBox
{
    TxtMessage = { Text = "Do you like white wine?", Foreground = Brushes.White },
    TxtTitle = { Text = "This is too cool", Foreground = Brushes.White },
    BtnOk = { Content = "Yes" },
    BtnCancel = { Content = "Noooo" },
    MainContentControl = { Background = Brushes.MediumVioletRed },
    TitleBackgroundPanel = { Background = Brushes.BlueViolet },

    BorderBrush = Brushes.BlueViolet
};

msg.Show();
MessageBoxResult results = msg.Result;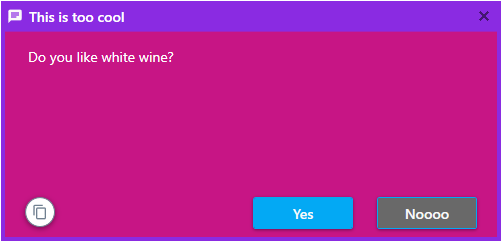
This library is built on top of the following toolkits:
- Material Design In XAML Toolkit – Comprehensive and easy to use Material Design theme and control library for the Windows desktop.
- Material Design Colors – ResourceDictionary instances containing standard Google Material Design swatches, for inclusion in a XAML application.
If you’ve improved Material Message Box and think that other people would enjoy it, submit a pull request. Anyone and everyone is welcome to contribute.
-
You could always contact me through Email for any feature or issue. ⭐
-
You need Visual Studio 2015 Community/Enterprise Edition (upwards) to build and test the solution.
The MIT License (MIT)
Copyright (c) 2021, Bespoke Fusion
Permission is hereby granted, free of charge, to any person obtaining a copy of this software and associated documentation files (the “Software”), to deal in the Software without restriction, including without limitation the rights to use, copy, modify, merge, publish, distribute, sublicense, and/or sell copies of the Software, and to permit persons to whom the Software is furnished to do so, subject to the following conditions:
The above copyright notice and this permission notice shall be included in all copies or substantial portions of the Software.
THE SOFTWARE IS PROVIDED “AS IS”, WITHOUT WARRANTY OF ANY KIND, EXPRESS OR IMPLIED, INCLUDING BUT NOT LIMITED TO THE WARRANTIES OF MERCHANTABILITY, FITNESS FOR A PARTICULAR PURPOSE AND NONINFRINGEMENT. IN NO EVENT SHALL THE AUTHORS OR COPYRIGHT HOLDERS BE LIABLE FOR ANY CLAIM, DAMAGES OR OTHER LIABILITY, WHETHER IN AN ACTION OF CONTRACT, TORT OR OTHERWISE, ARISING FROM, OUT OF OR IN CONNECTION WITH THE SOFTWARE OR THE USE OR OTHER DEALINGS IN THE SOFTWARE.
❤️
 https://github.com/denpalrius/Material-Message-Box